Launching a new product to market requires extensive planning, research, and testing. For products made from plastic, creating prototypes early on in the manufacturing lifecycle is an essential step in the design process. Prototypes allow you to test form, function, and manufacturability before committing to full production. Partnering with a custom plastic moulding company can streamline prototype development and provide invaluable feedback to perfect your product before launch. This article will walk through the typical prototyping process, from early concept to production-ready parts.
Developing the initial concept
Every new product starts as an idea. It may stem from identifying an unmet consumer need or improving upon an existing product. You may start with a rough sketch or description of the desired end result. At this early stage, the possibilities are wide open. However, as you start to explore materials and manufacturing methods, you need to narrow down the design parameters.
With plastic parts, designing for manufacturability is crucial from the very beginning. Certain shapes, features, and geometries work better than others when it comes to moulding plastic. The experts at custom plastic manufacturers can provide guidance on design dos and don'ts to avoid extensive revisions later on. Early feedback can help refine the concept with production in mind, saving considerable time and money down the road.
Creating the first prototype
Once you have a well-defined concept, it's time to produce the first prototype. This is where partnering with an experienced custom injection moulding company pays dividends. There are several prototyping methods to choose from, each with its own advantages and disadvantages. The right choice depends on factors like:
- Target quantity – Is it a single prototype or multiple iterations?
- Timeframe – How quickly do you need the prototypes?
- Accuracy – What level of detail and functionality is required?
- Budget – What is the acceptable cost per prototype?
For very early prototypes, 3D printing may provide the fastest and most affordable option. Although you won't achieve the same level of accuracy, durability, and fine details as with moulded plastic, it allows rapid iteration of the basic design.
CNC machining is another fast, flexible method for small batches. It produces prototypes from blocks of plastic, accurately machining the exterior details. However, the interior cannot be hollowed out as with moulded parts. The process also leaves visible machine lines, limiting cosmetic assessments.
For more refined prototypes with higher accuracy, vacuum forming or injection moulding are preferred. Vacuum forming pulls a heated sheet of plastic over a mould to make a shell. Parts are limited to open backs and simple geometry but make excellent visual and ergonomic prototypes.
Injection moulding uses steel moulds like final production, yielding extremely accurate prototypes. Lead times are longer and costs higher than other methods but allow comprehensive testing of the design. This is ideal for functional prototypes verifying dimensions, performance, and durability.
The experts at a custom injection moulding provider can help select the optimal prototyping technique based on your specific product, budget, and timeline. Their expertise and wide manufacturing capabilities ensure you choose the right process for each stage of development.
Evaluating and refining the design
Once you receive the initial prototypes, it's time for thorough testing and evaluation. This is when you confirm that the product meets the intended specifications and performance criteria. Prototypes should be evaluated for:
- Function – Does the product work as designed? Are the components and features operating correctly?
- Durability – Will it withstand expected use cycles and stresses? Identify potential failure points.
- Ease of Use – Are parts easy to assemble and operate? Are handles and grips placed appropriately?
- Ergonomics – Is the product comfortable during extended use? Are weight and balance optimised?
- Appearance – Is the aesthetic consistent with the product vision? Are surface finishes and decorations acceptable?
Ideally, you will identify most issues and refinements during prototyping before committing to production tooling. This may require multiple iterations, incorporating learnings from each round. Your custom moulder will provide recommendations to improve manufacturability and minimise production issues. Consider functional enhancements as well to provide a competitive edge.
Portfolio reviews with target users can provide additional valuable feedback. Customers often notice things that designers miss after being immersed in a project. Minor tweaks may significantly improve the user experience. The earlier you conduct market validation, the better.
Optimising the design for production
Once satisfied with the design through prototyping, it's time to optimise it for manufacturing. Your chosen moulding partner will translate the prototype into technical specifications for production tooling and processes. This is where their expertise can spot potential issues that may impact cost, quality, or cycle times.
Key areas for optimisation include:
- Draft Angles – Add sufficient draft angles so parts can eject cleanly from moulds. Insufficient angles may lead to sticking.
- Ribs & Gussets – Strategically placed ribs and gussets add rigidity while minimising material usage.
- Radii & Fillets – Generous internal radii and fillets reduce stress concentrations.
- Ejection Points – Place ejector pins in inconspicuous locations while enabling quick demoulding.
- Parting Lines – Minimise or hide parting lines on cosmetic surfaces.
- Sink Marks – Adjust wall thicknesses to avoid sink marks, especially on visible areas.
- Textures & Detailing – Simplify or modify textures that may cause mould wear or demoulding issues.
- Assembly – Design components for efficient assembly. Add joining features like snap fits.
An experienced moulder will optimise the design for quality, manufacturability, and cost-effectiveness. This fine-tuning can make a significant impact on production efficiency and part cost.
Creating production tooling
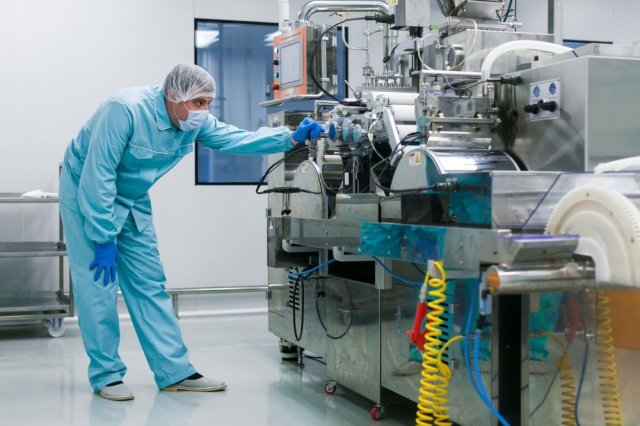
With the design refined and optimised, it's time to create production injection mould tooling. The moulds transform plastic pellets into finished parts, giving the final shape, details, and cosmetics. Moulds require high-precision machining and extensive polishing, especially for high-volume production.
Most moulds are CNC machined from tool steel and include components like:
- Cavity & Core Plates – Form the exterior of the part and interior details.
- Ejection System – Pins eject the part after moulding.
- Cooling Channels – Regulate mould temperature during cycling.
- Guide Pins & Bushings – Align plates and ensure precision.
- Sprues & Runners – Deliver plastic into the mould cavities.
The cost of a full production mould can easily exceed $100,000. By working with prototypes first, you can avoid expensive revisions after the mould is built. Your manufacturing partner will handle all aspects of mould design, machining, and finishing in-house to ensure high precision.
Running production samples
Before full production, sample parts are moulded to verify the tooling and dial in process parameters. Dimensional checks confirm each detail is moulded accurately and within specifications. Samples are also tested for function and cosmetics like surface finish, gloss, and colour consistency.
During sampling, process settings like injection pressure, fill time, cooling time, and mould temperature are optimised. This fine-tuning maximises quality and minimises cycle times. Any necessary tweaks to the tooling can be made at this stage before high-volume runs commence.
Thoroughly evaluating production samples provides confidence that the product will meet all specifications when ramping up. Once approved, you can focus on rolling out manufacturing without issues. Your moulding partner will work diligently to deliver the expected quality on time, every time.
Ramping up volume production
With tooling qualified and process parameters defined, it's time to shift into high-volume production. Your chosen moulding partner should have extensive production capacity, including:
- High-tonnage injection moulding machines to handle large shot sizes
- Integrated automation for rapid cycling
- Stringent quality control procedures
- Large stock of raw materials to avoid shortages
- Resources for part decoration like pad printing, laser etching, or plating
- Packaging capabilities to ship parts efficiently
During scale-up, maintain close communication regarding timelines, volumes, and any changes. Your moulder may suggest modifications to optimise cost as volumes increase. For example, tweaking the tooling design or plastic material formula.
Make sure to establish clear specifications for quality standards and visual acceptance criteria. Consistent quality monitoring ensures any defects are caught immediately to prevent large reject batches. Advanced moulders offer services like thermocouple process monitoring and frequency inspections to comply with even the most stringent requirements.
Ramping efficiently to full production requires a collaborative partnership and shared commitment to success from concept to customer. Selecting the right custom moulding provider assures a smooth transition to stable, high-quality manufacturing.
Partnering for success
Developing a new plastic product involves considerable time, cost, and expertise. Partnering with experienced custom plastic moulding improves the probability of launching on time with minimal headaches. Their knowledge and capabilities are invaluable throughout concept refinement, prototyping, tooling, sampling, and production. Leveraging these services accelerates speed to market while maintaining quality and controlling expenses.
For assistance creating and manufacturing your next plastic innovation, reach out to the experts at SDI Plastics. With years of experience along with advanced design and production capabilities, they become an extension of Client teams building from concepts through to final product development and manufacturing.


